How to insulate a foundation. How to waterproof various types of foundations with your own hands. Types of waterproofing for foundations
The foundation is the main supporting structure of any building without exception. The foundation parameters are selected based on the required load-bearing capacity, soil type and groundwater level. However, even correctly and efficiently performed concrete work does not guarantee its long service life. The foundation is affected by groundwater. As a result, subsidence and deformation of the foundation occurs. Concrete by nature absorbs water, which can rise up onto other building structures.
There is an actual problem with operation foundation made of concrete in climates characterized by freezing and thawing of water. Water that gets into concrete destroys the structure from the inside. Foundation waterproofing is done to keep the concrete base dry. This guarantees its long-term operation and dryness in the house.
If you take care of waterproofing during construction, you can prevent its destruction. If you have not yet decided whether or not to waterproof the foundation, remember that in the future, repair work to strengthen the foundation may exceed the cost of constructing the entire building frame. Also, these activities are quite labor-intensive and difficult to implement.
The construction of the foundation begins with design drawings and ends with waterproofing measures. High-quality waterproofing of the foundation is a complex and time-consuming task. To carry out the work successfully, you must have the necessary knowledge. Experience is also important; before starting work, it would be a good idea to consult with an experienced specialist in this field.
Foundation waterproofing technology
First of all, you should know that there are 2 main types of foundation waterproofing: horizontal And vertical waterproofing. We will talk about this in detail later in this article.
Before immediately starting waterproofing work, work is carried out to determine the initial conditions:
- Determination of groundwater level.
- Determination of the force of soil “swelling” after low temperatures.
- Determination of the level of homogeneity of soil composition.,

If groundwater flows under the foundation at a depth of more than one meter, roofing felt waterproofing will be sufficient.
If the distance from the foundation to the groundwater level is less than a meter level, two-layer horizontal waterproofing is performed. In this case, each layer is necessarily coated with mastic. If your financial condition is stable, it will not hurt to perform additional treatment of all concrete elements of the foundation base and basement walls with the so-called penetrating waterproofing.
If the groundwater level exceeds the base of the foundation or in the area where the building is erected there is constant heavy rainfall, it would be advisable to build a drainage system.
The total cost of waterproofing is affected by the total area. The simplest case will require you to fork out only for mastic.
Horizontal waterproofing
Horizontal waterproofing of strip (prefabricated) or monolithic (solid) foundations should be carried out in two places:
- Insulation is carried out at the basement floor level.
- Insulation is done at the junction of the foundation and the wall.
Horizontal waterproofing is carried out exclusively during the construction of the structure, so it must be completed in a timely manner. Before building the foundation, sand or clay spills onto the bottom of the pit. The thickness of the sand layer should be from 5 to 20 cm. This is the so-called leveling layer. The filled layer must be compacted. After compaction, a concrete mass up to 7 cm thick is poured. This is the preparatory layer for creating a waterproofing cake.
After two weeks, when the concrete has completely dried and become as strong as possible, anti-pressure adhesive waterproofing is applied to it. This insulation consists of four layers. First, the concrete base is generously coated with mastic, and roofing material is spread tightly over it. Next is another layer of mastic and another layer of roofing felt. Instead of two layers of mastic and two layers of roofing material, you can use only one layer of waterproofing.

After laying the waterproofing comes the last concrete layer, or concrete floor.
Vertical waterproofing
By vertical we mean waterproofing of the vertical surface of the foundation. For this type of insulation, a variety of materials are used that can be combined.
There are several types of vertical waterproofing:
- waterproofing pasted with rolled materials;
- waterproofing with liquid rubber;
- bitumen waterproofing;
- penetrating waterproofing.
Let's consider all these types.
Pasting using roll materials
Almost all of the methods listed below can be combined with each other to achieve maximum results. The most common and simplest are pasting and coating waterproofing of foundations.
For lining, roofing felt is most often used. First, the surface of the foundation is thoroughly coated with mastic or primer. Then roofing material is applied using a burner.

Ruberoid is used most often because... it is one of the cheapest and most practical materials when waterproofing a foundation is carried out. Various types of insulation are also used: brizol, hydroizol, isol, hydrostekloizol, etc. There is no fundamental difference between these materials in the method of application, composition or price. There is a new material for waterproofing STEINOPHON 290, but it is better to use it for adhesive waterproofing of foundations indoors.
Treatment with liquid rubber
When carrying out waterproofing work with liquid rubber, it is necessary to carry out some preparatory measures:
- clean the surface of the foundation from dirt and dust;
- prime the surface;
- treat with primer or bitumen;
- apply liquid rubber in one or several layers.
Methods and features of waterproofing liquid rubber can vary greatly depending on the manufacturer, composition and modification of liquid rubber. For example, Elastopaz rubber requires several layers of application and does not require preliminary preparation of the surface to be waterproofed. At the same time, liquid Elastomix rubber requires priming and primer treatment.

After applying liquid rubber, there are no seams, gaps, joints or waterproofing irregularities left on the surface. It adheres perfectly to the surface, can last for several decades and is not a fire hazard.
Coating (bitumen) foundation treatment
The most affordable option today is considered to be coating waterproofing based on the use of bitumen. For this purpose, it is necessary to purchase bitumen; it is usually sold in bars.

The waste and bitumen are poured into a metal container in a ratio of 30% to 70%. Next, the container needs to be heated using a lit fire or gas stove.
It is necessary to apply 3 to 5 layers of bitumen. The resulting layer should be about 30-50 mm. During the entire application process, the composition should not cool down.

Bitumen in concrete fills all microcracks, thereby preventing moisture from entering them. This insulation will last approximately 5 years, which is considered a good indicator for this type of insulation. After the declared service life, bitumen begins to rapidly deteriorate, which opens a direct path for water molecules.
To significantly increase the service of coating-type waterproofing, bitumen-polymer mastic is used. This mastic has a longer service life.
Penetrating foundation waterproofing
The principle of penetrating foundation waterproofing is based on the penetration of substance particles into the concrete and their subsequent crystallization inside. A kind of “clogging” of the concrete capillaries occurs, as a result of which the concrete is not able to pass moisture through itself.
However, penetrating waterproofing, unlike all the methods described above, has a big drawback: it is not self-sufficient. Penetrating waterproofing can only be used in conjunction with other methods of foundation waterproofing.

The photo below shows how penetrating insulation works.
Materials for waterproofing concrete surfaces indoors
Perhaps the ideal option for creating a waterproofing layer indoors is the development of Stenophon LLC - Steinophon 290 film.
Film is a universal material for waterproofing. The film consists of food-grade polyethylene and therefore does not decompose. It is an environmentally friendly product and does not emit toxic substances; such features contribute to the use of the film in residential buildings.
Stenofon is quite low hygroscopic (low moisture absorption), which allows it to be used as a reliable and high-quality material for waterproofing. In addition to waterproofing characteristics, the material has excellent sound-absorbing qualities, which makes it a highly effective soundproofing material.
Today, Stenophone has found wide application in construction. This material is used between the contacting surfaces of concrete structures, which prevents the occurrence of cracks during concrete compression.
The stability and integrity of the entire structure directly depend on the strength and durability of the foundation. erected on this basis the building, and even, to a certain extent, the safety of the people living in it. That is why special attention is always paid to the process of constructing the foundation part of a building, and only the best building materials are used for this.
However, no matter what high-strength materials have not been used at the “zero cycle”, they all have a common ruthless “enemy” - water, in one or another state of aggregation. Moisture can reduce the strength of the structure being created in a relatively short time, so do-it-yourself waterproofing is the most important stage in the independent construction of your own home, which should never be overlooked.
Why is moisture dangerous for the foundation?
The water that is familiar to all of us, seemingly completely harmless to an amateur’s eye, can cause a lot of trouble to the foundation of a building:

- Firstly, it is known that water has the ability to significantly increase in volume when it transforms into a solid state - when it freezes. Penetrating into micropores and cracks of even the most durable structure when temperatures drop below 0º C, it is capable of expanding them, increasing in size, and sometimes literally tearing them into separate fragments.

- Secondly, water on the surface of the earth, contained in the upper layers of soil and even drop-down in the form of precipitation is never clean. It is always saturated in one concentration or another with very aggressive chemical compounds - industrial emissions, agricultural chemicals, waste oil products, car exhaust, etc. Such substances cause surface erosion of concrete, from which it loses its strength and begins to crumble.

- Thirdly, these same chemical compounds plus dissolved In water, oxygen activates corrosion processes on the reinforcement grid. Not only does the inherent strength of the entire reinforced structure decrease, it leads to the formation of internal cavities in the thickness of the material and ultimately ends in delamination of the upper layers of concrete.
- And fourthly, we must not forget that What water has a pronounced leaching property (how can one not remember the proverb - « water wears away stones). Constant exposure to even pure chemical water is always associated with the gradual washing away of foundation material particles from the surface, the formation of surface sinks, cavities, etc.
Water in the soil adjacent to the foundation can be in different layers and in different states:
- The upper, so-called filtration layer is water that falls with precipitation, formed from melting snow or simply from an external spill (usage water for domestic and agricultural purposes, accidental bursts of highways, etc.). Sometimes, if a high-lying waterproof layer gets in the way of absorption, then in a certain limited area a fairly stable horizon can form - perched water.
The saturation of the upper filtration layer of water is always highly dependent on the time of year, established weather, and amount of precipitation and is not a constant value. In addition to high-quality waterproofing, a well-thought-out storm drainage system will play an important role in reducing the impact of moisture from this layer on the foundation of the building.
- The upper layers of the soil always contain soil (ground) moisture, which is constantly retained there due to capillarity or the adhesive properties of the soil. Its concentration is quite constant and depends very little on the level of precipitation, time of year and etc.. It does not exert any dynamic, leaching loads on the foundation, and its negative impact is limited to capillary penetration into materials and chemical “aggression”.
To counteract ground moisture, a waterproof layer of waterproofing is sufficient. True, in excessively wet areas of the area, with a tendency to waterlogging, it will be necessary to provide a water drainage system.
- Underground groundwater is the upper aquifers characteristic of a particular area and its topography. The depth of their occurrence depends on the location of the water-resistant soil layers, and the filling capacity is quite strongly influenced by seasonal factors - abundant snow melting, prolonged rains or, conversely, established drought.
The depth of these aquifers and its seasonal fluctuations can be clearly observed in the nearest well - ordinary or technological drainage. In addition to direct penetration into the thickness of the foundation material, these waters can also exert hydrostatic pressure on the buried part of the structure. If such layers are located at a high level, the maximum amount of waterproofing work will be required, with the obligatory installation of an effective drainage system around the building.
What types of waterproofing are used to protect the foundation?
In order to prevent the negative impact of moisture on the foundation, the following types of waterproofing and other construction and installation works are used:
- Giving construction materials with additional water-repellent properties.
- Creation waterproof coatings on the vertical walls of the foundation, from its base to the top edge of the base.
- Reliable waterproofing of horizontal interlevel seams, preventing capillary upward penetration of moisture.
- Reliable protection of the waterproofing itself from external mechanical influences.
- Measures to reduce the negative impact of negative temperatures.
- Installation of a drainage system around the house.
- Creation of a reliable system for draining rain and melt water - drainage and storm sewerage.
- Ensuring reliable ventilation of basements and basements.
The proposed figure shows, as an example, a possible general scheme for waterproofing the foundation of a building:
The diagrams are marked with numbers:

1 – the base of the foundation, which usually rests on a compacted sand and gravel bed. Between it and the vertical wall of the foundation (2) there must be a cut-off horizontal waterproofing (4), which overlaps with the insulating layer arranged in basement floor rooms (4) between the base and the screed.
The outer vertical wall has a coating waterproofing coating (5), additionally protected by a waterproof membrane (7) and covered with a layer of geotextile (8), which protects against abrasive and other mechanical effects.
The upper edge of the plinth (foundation wall) is also necessarily covered with waterproofing roll material (6), on top of which further construction of the walls and ceilings of the building will be carried out.
To remove moisture, a drainage system is provided - pipes (9) laid around the perimeter at the level of the base of the foundation in a gravel cage. For more reliable protection against water from precipitation entering deep into the soil, it is advisable to build a clay castle around the house (10).
In areas with a harsh climate, severe freezing of the upper layers of the soil, or in the case where residential or utility premises are planned to be located in the basement or basement, the waterproofing system of the foundation and basement is complemented by a system for their insulation:
The diagram in general terms repeats the one posted above, so the main numbering of parts and assemblies is preserved. In addition shown:

1.1 – sand and gravel cushion under the base of the foundation. This layer can also be made of lean concrete with coarse-grained filling.
12 – insulating panels made of extruded polystyrene foam, installed externally on top of rolled waterproofing along the entire height of the foundation and basement walls.
13 – plaster layer of the basement finishing. Currently, special base thermal panels are often used instead - they provide both insulation and reliable protection from direct exposure to water.
14 – wall of the building being erected. The figure clearly shows that it begins to be laid from the layer of horizontal cut-off waterproofing of the foundation.
The choice of a specific type of waterproofing, and therefore the materials used for it, largely depends on the specific purpose of the room located in the basement. The existing classification (according to BS 8102 standards adopted in Europe) divides them into four classes:
- The first, lowest class is utility or technical premises that are not equipped with electrical networks. They tolerate wet spots or even small leaks. The wall thickness must be at least 150 mm.
- The second class also includes technical or utility rooms, but already equipped with ventilation, in which only wet fumes are allowed, without the formation of damp spots, with a wall thickness of at least 200 mm. It is already permitted to install electrical appliances of standard mains voltage here.
- Third class is the most common, and most of all of interest to individual developers. It includes all residential buildings, offices, retail outlets, and social facilities. The thickness of the walls should not be less than 250 mm; a natural or forced ventilation system is required. No penetration of moisture is allowed.
- As a rule, you don’t have to deal with the fourth class of premises when building your own home - these are objects with a specially created microclimate - archival storage facilities, libraries, laboratories and others, where special requirements are imposed on a constant, clearly established level of humidity.
The table below shows the recommended types of waterproofing and the materials used for its installation, indicating its degree of strength, the protection created from one or another effect of groundwater and compatibility with the classes of equipped premises:
| Type of waterproofing and materials used | crack resistance | degree of protection against water | room class | |||||
|---|---|---|---|---|---|---|---|---|
| perched water | soil moisture | ground aquifer | 1 | 2 | 3
| 4 | ||
| Modern adhesive waterproofing using polyester-based bitumen membranes | high | Yes | Yes | Yes | Yes | Yes | Yes | No |
| Waterproofing installed using polymer waterproof membranes | high | Yes | Yes | Yes | Yes | Yes | Yes | Yes |
| Coating waterproofing using polymer or bitumen-polymer mastics | average | Yes | Yes | Yes | Yes | Yes | Yes | No |
| Flexible coating waterproofing using polymer-cement compositions | average | Yes | No | Yes | Yes | Yes | Yes | No |
| Coating rigid waterproofing based on cement compositions | low | Yes | Not | Yes | Yes | Yes | No | No |
| Impregnating waterproofing that increases the water-repellent properties of concrete | low | Yes | Yes | Yes | Yes | Yes | Yes | No |
After viewing the table, one can make a very erroneous conclusion that, for example, for a residential building, just one type of insulation will be sufficient. Practice shows that this may clearly not be enough, and most often an integrated approach is used, when one type, combined with another, creates a truly reliable waterproof barrier for the foundation.
Horizontal waterproofing of the foundation
It is advisable to start the review with horizontal waterproofing. The fact is that it can be carried out exclusively during the construction of the building. If the vertical one can be carried out even on a fully constructed building, for example, after purchasing a finished house, then it is almost impossible to carry out the overlooked horizontal one - it is always planned in advance. There are, however, modern methods of injection waterproofing, but they are very expensive and still remain only a half-measure aimed at minimizing previously made miscalculations.
- The first unique waterproofing level is a compacted sand and gravel cushion under the foundation soles being laid or under the monolithic structure being poured.
- If a concrete slab is planned to be poured in a basement or basement room, then its first layer is also made over such a backfill, so that the level is equal in height to the top edge of the laid soles or the first layer of “tape”. Made from lean concrete. This is where the first layer of horizontal waterproofing is laid - the room is completely covered from below from the penetration of soil water. In addition, a barrier is created against the capillary rise of moisture along the walls of the future foundation.

- Waterproofing is carried out using roofing felt, adjacent sheets of which are laid with overlaps of 100 - 150 mm, with the obligatory “boiling” of them using a gas burner. If layers of roofing material are combined, laid on the floor and on platforms for further pouring of the foundation tape, then the overlaps are increased to 250 — 300 mm.
- It is recommended to spare no expense and perform such insulation even in two layers. In this case, the stripes of the second layer should be oriented perpendicular to the first.
The second “line of defense” against the capillary spread of moisture should be organized at the point where the monolithic foundation (after it is poured) transitions into the basement part, if this is provided for by the project. The importance of this waterproofing layer is clearly demonstrated in the diagram presented:
 Location of “boundaries” of cut-off horizontal waterproofing
 For such waterproofing, the same roofing material is used, laid on a completely hardened and strengthened concrete base, cleaned of dirt and dust and carefully primed tar mastic. The material is laid in at least two layers by gluing them together with mastic or using a thermal method (fusion).
If the project does not provide for a separate base, and its role will be played by the protruding above-ground part of the monolithic foundation, then this step is understandably skipped. But in any case, exactly the same actions are taken along the upper edge of the foundation or plinth, regardless of whether floor slabs are laid on this basis or walls are built from any material.

Sometimes work on waterproofing the upper horizontal plane of the foundation is combined with similar operations on vertical walls, thereby obtaining one monolithic insulator surface.
Vertical waterproofing of foundation walls and plinth
Vertical waterproofing of foundation walls is a prerequisite for long-term trouble-free operation of the building. When building a new house, it is thought out in advance. It is also carried out on houses that have been built a long time ago - if there are obvious signs that the old waterproofing is clearly not coping with its functions - there are pronounced traces of moisture penetration into the premises, or if when purchasing a house there is no certainty that such work was carried out previously.
 Spots like these are a clear warning sign
 - To carry out such waterproofing work, it will be necessary to expose the foundation walls to the maximum possible depth - right down to its base. During construction, this factor is usually taken into account immediately, leaving the necessary trench around the perimeter - it will be needed both for waterproofing and for installing a drainage system.
- On an old building you will have to start with excavation work. First, the concrete blind area around the base is dismantled - using a hammer drill or manually. Then they dig deeper, going deeper to the bottom of the foundation. The width of the trench can be any - the main thing is that it allows you to freely carry out all the necessary actions. Usually a width of up to 1 meter is sufficient.
- The walls are thoroughly cleaned of soil residues and inspected.
- All loose areas, peelings, and unstable areas must be unconditionally removed. The surface must be cleaned to a monolithic structure.
- If a layer of waterproofing is applied to the walls, but its functionality is questionable, then it is also better to completely remove it.
Repair of wall surfaces and their impregnating (penetrating) waterproofing
- All cracks and cracks on the surface are cut into rectangular grooves measuring 25 × 25 mm along the entire length. Similar operations are carried out in places of vertical and horizontal joints of reinforced concrete blocks with the removal of old mortar. If the foundation is block or made of brick, the seams are cleaned to the same depth - up to 25 mm.

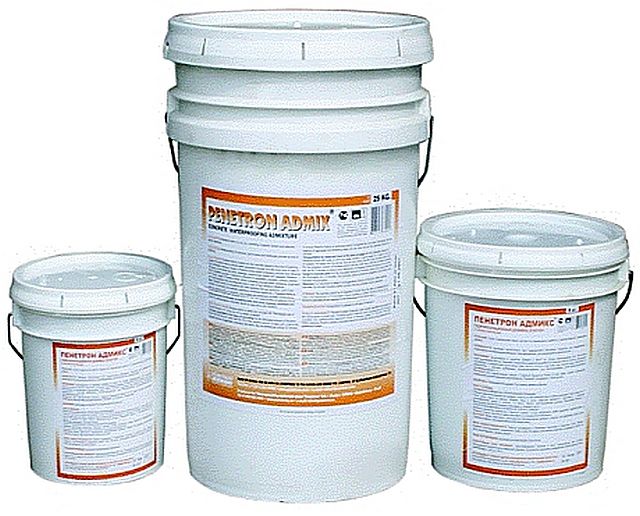
- As a repair composition, we can recommend the specialized waterproofing dry construction mixture “Penecrete”, which is used in combination with the deep penetration primer “Penetron”.
- "Penecritus" has good plasticity, high adhesion to almost all building materials, and after complete hardening it becomes reliable waterproofing agent, firmly “sealing” seams and cracks. It is important that after filling the seams the material does not shrink.

— “Penetron” or other primers of similar action penetrate deeply into the thickness of concrete, forming additional crystalline bonds there, which significantly strengthens the material, and firmly closing the pores, preventing capillary penetration of moisture.
The advantage of these materials is that they are applied to a wet surface, thereby reducing the time required for work - during construction there is no need to wait for the concrete to dry completely.
“Penecrete” is prepared in the usual way - like any dry construction mixture, using a construction mixer or drill with an attachment, in strict accordance with the instructions supplied with it. "Penetron" is sold in a ready-to-use form.
- So, all cut cracks, joints and seams are first moistened with ordinary water, and then primed"Penetron".
- Then, they are filled as tightly as possible, without leaving air “pockets”, with a repair composition - “penecrete” to the general level of the wall.
- After setting of the repair mortar over the entire surface The outer wall of the foundation must be moistened (you can use a hose with a spray nozzle) and covered in two layers with the same deep penetration soil.
- If possible, then That Exactly the same operations are carried out on the internal walls of the foundation.

The created system of protection against moisture penetration is quite effective. There is even an opinion that she can single-handedly cope with the tasks of foundation waterproofing, and, carried out even on one side of the wall. Nevertheless, it is still better to use such an impregnation technology as the main one only from the inside and on the part of the foundation or plinth protruding above the surface of the earth. On the outside, it is still worth playing it safe and protecting the walls in the area of their direct contact with the ground with additional waterproof layers.
Video: using penetrating waterproofing of the Penetrat system
Coating vertical waterproofing of foundation
Coating waterproofing of foundation walls is perhaps the most common technology among private developers. It is quite simple to implement - almost anyone can do it, does not require excessively high material costs, and does not take much time.
To work you will need:
— Bitumen primer - it can be purchased in a ready-made form at the store (bitumen primers). It is not difficult to make it yourself - bitumen heated to a fluid state is mixed with a solvent, which is most often used as gasoline. The weight ratio of gasoline to bitumen should be approximately 1:3 ÷ 1:4. It is important that when preparing the primer, bitumen is poured into gasoline, and not vice versa. The composition should have an even liquid consistency, similar to regular paint.

Prices for waterproofing for foundations
Waterproofing for foundation
Step-by-step instructions for waterproofing a foundation with self-adhesive bitumen-polymer material “Technoelast-Barrier (BO)”
The table below provides illustrated step-by-step instructions for performing waterproofing work on the foundation using a roll of self-adhesive material on a bitumen-polymer base, “Technoelast-Barrier (BO)” from the well-known Russian manufacturer “TechnoNIKOL”.

This rolled material (standard release form is a 20×1 m roll) is designed for waterproofing concrete slab bases, floors, and plinths, with a depth from the ground surface of up to 3 meters, and the absence of high groundwater. The convenience of “Technoelast-Barrier (BO)” is that its use does not require additional equipment, is not associated with “hot” processes, that is, there is no stage of melting using a gas burner - work can be carried out even on a flammable base, in enclosed spaces and limited spaces.
Prices for Technoelast-Barrier
TechnoNIKOL technoelast
| Illustration | Brief description of the operation being performed. |
|---|---|
 | The material itself is a baseless structure, consisting of a top layer - a dense polymer film with the TechnoNIKOL logo printed on it, and a second layer - a bitumen-polymer viscous composite material that has excellent adhesion to prepared substrates. Before installing the material, this adhesive layer is covered with a special protective film backing, which is removed immediately before installation. |
 | The adhesive bitumen-polymer layer does not need to be subjected to thermal effects - the material is simply glued to the treated surface, and then straightened and rolled using wide brushes, rubber or silicone rollers, or hand rollers. Other tools you will need are a knife for cutting the material, a tape measure, a ruler, a square for taking measurements, marking and cutting, a roller and a brush for preliminary priming of the surface. |
 | Let's start our consideration with horizontal waterproofing. As already mentioned in the article, this could be, for example, a slab foundation or a floor in a basement or basement. First of all, you need to make sure once again that there are no gross defects on the surface - potholes, cracks, sagging of hardened mortar and other serious flaws. All this must be eliminated - removed or repaired, achieving a flat surface, otherwise the chosen waterproofing method may become ineffective. The rolled material should adhere tightly to the surface over its entire area. |
 | It is easy to check the evenness of the surface for waterproofing by applying a long rule to it. |
 | Perfect evenness is not required - it is quite enough if the differences in a two-meter area are no more than 5 millimeters. |
 | In order for the primer to lay well and evenly on the surface, it must be cleared of small construction debris and dust. To do this, it is carefully swept... |
 | ...and ideally, it is best to clean it and completely remove dust using a powerful construction vacuum cleaner. |
 | The next step is to apply a primer, that is, a special bitumen composition - a primer. However, there are certain restrictions on the use of various primers, depending on the moisture level of the concrete surface. Residual moisture is measured using a special device - a moisture meter. It is clear that not everyone has such a device. You can get by with a simpler solution - put a 1000x1000 mm polyethylene film on the fully matured concrete surface, gluing it around the perimeter with tape. If after 24 hours there are no drops of condensation on the film, then the concrete can be considered dry, with a residual moisture content of less than 4% by weight. |
 | In such conditions, you can use TechnoNIKOL primers No. 01 and No. 03 on an organic basis. |
 | If the residual moisture content of the concrete exceeds 4%, then you can use the water-soluble primer “TechnoNIKOL” No. 04. But even in this case, the humidity cannot be more than 8%, that is, the concrete must fully gain strength and mature. It makes no sense to carry out any waterproofing work on a foundation that has not met the entire period required for maturation. |
 | The primer is spread thickly and sparingly over the surface using a roller. A consumption of 300÷350 ml per square meter of area is considered normal. |
 | It is necessary to ensure that the distribution of the primer over the surface is uniform, without “bald spots”. In hard-to-reach places, especially at the intersection of vertical and horizontal surfaces, you cannot do without using a brush. |
 | It is recommended that after applying the primer there is no long pause before laying the main waterproofing material. The only thing you need to wait for is for the applied primer to dry completely. It’s easy to check - press a regular paper napkin onto the treated surface, which already seems dry. If black marks remain on it, it is too early to proceed to further operations. |
 | But if the napkin remains clean after such an “experiment”, we can assume that the concrete surface is ready for basic waterproofing work |
 | The waterproofing roll is delivered to the work site. On a horizontal surface, you can mark a line along which the first strip of material will be laid. |
 | The outer packaging of the roll is opened and removed as unnecessary. |
 | The next step is to roll out the Technoelast-Barrier (BO) roll along the entire length of the area to be waterproofed. At the same time, it is necessary to adjust its position so that the spread canvas lies exactly along the intended line. Naturally, the rolling is carried out so that the polymer layer with the logo is at the top, and the protective film backing is at the bottom. |
 | After rolling out, the sheet is cut in place. It is best to do this along a ruler, using a sharp construction knife. |
 | After trimming, the canvas spread along its entire length must be carefully rolled from both sides to the center without moving its position. It is more convenient, of course, to perform this and all further operations together, together with an assistant. |
 | In order to prevent distortions in the direction and creases of the waterproofing material itself when rolling, it is recommended to use old cardboard sleeves as reels for these purposes. |
 | Now the final laying of the material begins. First, you need to cut the film backing material along the transverse line along the entire width of the roll. This must be done carefully, without pressing the knife, so as not to accidentally cut through the canvas. |
 | After this, along the cut made, the substrate is separated in a narrow strip from the adhesive surface of the waterproofing, also along the entire width of the roll. |
 | Now, gradually pulling out the backing film, the roll is finally laid out from the center in one direction. The adhesive bitumen-polymer layer comes into adhesive contact with the concrete surface coated with a bitumen primer. |
 | It is more advisable to do the work together: one worker, pulling out the film backing, gradually unrolls the roll. The second, without hesitation, immediately smoothes the laid canvas, expelling possible air bubbles from under it. The most convenient way to do this is to use a wide brush with a long handle, as shown in the illustration. Then the same operation is repeated in the other direction from the center. As a result, the first sheet is laid. For the central areas of the glued sheet, pressing with a brush (with a well-prepared concrete surface) is sufficient. But it is advisable to also roll the edges, in a strip of approximately 150 mm on each side, with a heavy metal or rubber roller. |
 | When gluing the next sheet lying parallel to the first, observe the following rule - the overlap should be at least 100 millimeters. The overlap strip is rolled with a roller to ensure complete sealing of the sheet joint. |
 | Of course, when laying waterproofing, they try to use entire sheets along the entire length. But sooner or later a situation arises when you have to join two strips along the end edge. There are also certain standards here. |
 | Even at the stage of “trying on” the next canvas, the necessary margin for overlap is immediately laid down. |
 | The minimum width of the overlap strip should be 150 millimeters. |
 | But that's not all. If you get a T-shaped joint, that is, two sheets laid and connected along the end side simultaneously overlap along their long side with the previously laid sheet, it is recommended to perform another operation. On the sheet that ends up in the middle (that is, the edge lies on the previously laid sheet, and then overlaps at the end with the next one), it is necessary to cut off the corner. |
 | The dimensions of the legs of this removable triangle correspond to the above parameters for the overlap of the canvases along the length and at the end. A rigid lining is placed under the edge of the sheet, and the corner is cut off with a knife. |
 | After this, the final “assembly” of this connecting unit is carried out, which is then necessarily rolled with a heavy roller for reliable sealing. The cut of the middle sheet in the joint turns out to be “packed” between the upper and lower sheets, so that the tightness is fully ensured. |
 | If similar T-shaped connecting nodes are found on adjacent strips, then the distance between them should be at least 500 millimeters. By the way, in this illustration you can clearly see the same cut corner, covered with the top sheet and rolled with a roller (shown by the red arrow). |
 | The work continues in the same manner until the entire horizontal surface requiring waterproofing is covered. The waterproofing layer itself also needs protection. If it is not intended to be backfilled with soil (for example, it is the floor of a basement or basement floor or a monolithic foundation slab), then a reinforced concrete screed (the so-called screed without connection to the base, on a separating layer), with a thickness of at least 50, must be installed over such waterproofing. millimeters. |
 | Now we move on to vertical waterproofing of the foundation. This is usually a more complex operation, since the surface often has many intersections of planes both vertically and horizontally. Work is always carried out in sections from bottom to top, that is, the upper canvases overlap the lower ones, allowing free drainage for moisture (the sequence and direction are shown schematically in the illustration). But before this, it is necessary to carry out a whole series of preliminary operations - surface preparation, formation of transition fillets, priming and creation of a reinforcement belt. Let's talk about everything in order. |
 | They begin again by checking the condition of the waterproofed surface. There should be no high sagging, bumps, dips, cracks and crevices, that is, anything that can interfere with the tight fit of the Technoelast-Barrier (BO) fabrics over its entire area, without leaving air voids. |
 | The requirements for level differences are the same as on a horizontal surface, that is, within 5 millimeters over a two-meter area. |
 | When vertically waterproofing the foundation, sharp fractures from top to bottom are completely unacceptable, that is, pronounced horizontal internal angles, which can become an area of moisture accumulation. That is, along the line of intersection of the vertical and horizontal planes, it is necessary to take measures to straighten the fracture as much as possible. This is done by laying out so-called transition fillets. The cross-section and dimensions of such a fillet (at least 100 millimeters along each leg) are shown in the illustration. |
 | To lay out fillets, you can use a regular cement-sand mortar, for example, in a ratio of 1:3. But in this case, you will have to wait for the concrete to completely harden “in full,” that is, within 4 weeks. So it is better to lay out the fillets immediately after removing the formwork from the foundation slab and discarding the soil from it. The optimal solution would be to use a special polymer-cement based building mixture, intended specifically for waterproofing work - it will create a reliable barrier against moisture in this vulnerable place, and it hardens and gains strength very quickly. The composition is diluted and kneaded in accordance with the instructions attached to it. |
 | The dry mixture is poured into the required measured volume of water and mixed until completely ready - obtaining a homogeneous plastic consistency. |
 | Then, using a regular spatula, fillets are formed, adhering to the dimensions indicated above. |
 | The laid fillets are left until they dry completely and gain strength. |
 | This illustration clearly demonstrates that fillets are laid out at all internal corners of the transition from the vertical to the horizontal plane. After the fillets are completely ready, they move on to the next stage of work. |
 | The next step is to thickly coat the entire surface for waterproofing with primer. On large areas it will be more convenient to work with a roller. |
 | But all difficult areas of the surface - external and internal corners and fillets - must be coated with a brush, so that not the slightest gap remains untreated with primer. Subsequent operations are carried out after the primer has completely dried - how to check this has already been described above. |
 | Next comes the most important stage - the creation of the so-called reinforcement belt. Its essence lies in the fact that all “problem” areas, without exception, are initially covered with strips of material, and only then, on top of the reinforcement, will the main waterproofing layer be installed. As already mentioned, the work is carried out from the bottom up. It often happens that work starts from an already waterproofed horizontal base. Another option is that the lower part of the structure consists of a concrete foundation preparation. It will have to be covered with material along its entire width, while adhering to the rules that apply on horizontal surfaces (see above). The illustration, just as an example, shows a belt of horizontal waterproofing 300 mm wide - it is assumed that the surface of the concrete preparation of the foundation has been covered. In the event that such a structural element is not provided (the tape was poured directly onto the sand and gravel bed), then the task is simplified. Our example shows probably the most complex option, with two fractures of the waterproofing surface at different levels. |
 | When creating reinforcement on any of the fillets, cut out a sheet of such width that there is a strip of at least 100 mm wide on both the top, on the vertical plane, and the bottom, on the horizontal plane. |
 | As a rule, all elements are cut out and tried on manually, directly at the site of future installation. After adjustment, the fragment is immediately glued to the specified area. |
 | The scheme of actions is simple: the protective backing is removed from the cut fragment sequentially as it is glued. Any glued element of the reinforcement belt is immediately rolled with a rubber or silicone roller. |
 | Further, the illustrations show some techniques for gluing waterproofing on various parts of the reinforcement belt. The strip is glued to the outer vertical corner. The rule is still the same - when moving to different planes, the minimum strip width on each of them should be 100 mm. |
 | "Sole" of the outer corner. |
 | The inner vertical corner is covered. Naturally, work on creating reinforcement from below should already be completed. |
 | The upper protruding part of the strip, covering the inner corner, is cut in two, and the “petals” are spread apart. |
 | The remaining gap between them is sealed on top with a small square fragment of waterproofing. |
 | Following the basic rules, they waterproof all “problem” areas. Of course, a certain amount of intelligence will be required, making decisions applicable to the specific conditions of the work. In the example under consideration, the finished reinforcement belt looks like this. |
 | After this, they move on to gluing the main layer of waterproofing. It is recommended to adhere to the rule - no glued canvas should have more than one change in direction, otherwise it may become deformed with the appearance of voids. The work is carried out according to the same principle - from the lower sections to the upper ones: fitting, cutting, and then the final gluing of the fragment are carried out. The overlap on the end part of any fragments should be, as with horizontal waterproofing, at least 150 mm, on the side - 100 mm. |
 | In this case, the lines of vertical joints at adjacent levels must be spaced at a distance of at least 300 mm. |
 | The illustrations below show examples of gluing basic waterproofing. The sheet is fitted and cut to cover the horizontal “step” and the vertical wall of the foundation slab located below. |
 | Unlike the technology of gluing waterproofing using the fusing method, in this case each of the canvases will be attached after fitting from top to bottom. At the top, the protective backing is removed and the canvas is fixed to the surface. |
 | To ensure secure fixation, the upper part can be immediately rolled with a roller. |
 | Then, carefully removing the protective film sequentially, gluing the rest of the cut out fragment is carried out. |
 | They move to the next section of the same level - and continue in the same sequence. |
 | In areas of large overlap of sheets at the bottom at the inner corners, trim the top sheet diagonally, as shown in the illustration. |
 | Then this unit is glued, followed by rolling with a roller. |
 | After complete completion of work at this level, they move higher - to a vertical straight section of the foundation strip. Waterproofing is carried out in compliance with the same rules and technological techniques. |
 | The glued waterproofing sheets must be fixed along the top edge. For this, an aluminum fixing profile is used, which is attached to the foundation strip with dowels through the holes on it. There is a bend on the profile - it should be located on top in the direction from the wall. |
 | The profile is tried on, cut to the required size, then holes are drilled in the wall, dowels are driven in and screwed in. Two dowels are placed along the edges of the profile, that is, in the first two holes in a row. Further installation proceeds in increments through one hole. |
 | If joining of two profiles is necessary, then a compensation gap of about 8 ÷ 10 mm must be left between them. |
 | After all the planks around the perimeter of the foundation are secured, the gap between the bent edge and the profile wall is tightly filled with polyurethane sealant using a construction syringe. |
 | As a result, the completely waterproofed surface of the strip foundation looks like this. However, it must be protected from mechanical damage when backfilling the soil. |
 | For this purpose, extruded polystyrene foam boards can be used. It is rigid and strong enough to withstand mechanical loads, and the foundation strip, among other things, also receives good insulation. |
 | Another option, when insulation is not required, is to use a special profiled membrane “PLANTER - standard”. It is characterized by high strength, elasticity, and raised “bosses” provide the necessary damping effect when backfilling soil. |
 | This membrane is attached to the vertical surface of the foundation strip immediately before backfilling the pit. In this case, its relief protrusions should be facing towards the waterproofed surface. At this point, the work on waterproofing the strip foundation can be considered complete. |
There are other methods of waterproofing foundation walls - cement-polymer plasters or coating compositions, solid polymer membranes, bentonite mats, similar in principle to a “clay castle”, fusing. However, in the conditions of individual construction, those mentioned in the publication are more often used.
Video: waterproofing the foundation by fusing rolled materials
And lastly, waterproofing the foundation will be effective only in those conditions where a well-thought-out management of storm and melt water is provided - drains from the roof, ebbs on the base, ground or underground storm inlets and drainage channels, etc. If water has direct access under the walls of the building, then sooner or later it will “do its job” and the reliability of the foundation’s waterproofing will be compromised.
The distinctive feature of a strip foundation lies in its very name. It is a closed chain - a “tape” (a reinforced concrete strip laid under load-bearing walls). Thanks to the use of a strip foundation, resistance to soil heaving forces increases, while the risk of skewing or subsidence of the building is minimized.

Strip foundation - photo of a freshly poured structure
This type of foundation is constructed on dry or heaving soils. Moreover, the greater the weight of the future structure, the deeper the foundation is laid (sometimes even up to 3 m, depending on the depth of soil freezing and the level of groundwater).


These and other characteristics are regulated by GOST 13580-85 and SNiP 2.02.01.83.
GOST 13580-85. REINFORCED CONCRETE PLATES FOR STRIP FOUNDATIONS. Technical conditions. File for download
SNiP 2.02.01-83. FOUNDATIONS OF BUILDINGS AND STRUCTURES. File for download
During construction, special attention is paid to waterproofing, since the strength, quality and durability of the structure will depend on it. In the absence of protection, groundwater and precipitation can significantly damage concrete, and the consequences can be the most tragic - from permanent dampness to subsidence and cracking of walls. For this reason, waterproofing a strip foundation with your own hands is one of the most critical stages.


Waterproofed foundation - photo
Below is the average depth of soil freezing in different regions. If your region is not in the table, then you need to focus on the one that is closest to others.


Regardless of the chosen insulation method (we will talk about them a little later), you must adhere to a number of technical requirements in your work.
- You should definitely take into account the groundwater level, because the type of insulation depends on it.
- It is also necessary to take into account the conditions of future operation of the facility (if, for example, a warehouse is being built, then the requirements for waterproofing will be more stringent).
- It is also necessary to remember about the possibility of flooding during large floods or precipitation (this especially applies to loose soil).
- The force of “swelling” of the soil during frost also plays an important role (during defrosting/freezing, the structure and volume of water change, which can lead not only to the rise of the soil, but also to the destruction of the foundation).
Basic methods of water protection
Waterproofing can be of two types - vertical and horizontal. Let's consider each of the options.
Important information! When constructing the foundation, there is no need to save money and abandon the sand “cushion”. Sand is needed not only to prevent concrete leakage, but also to prevent washout of the structure.


It is carried out during the construction of the foundation, and additional time (15-17 days) for preparatory activities may be required. The main function of such insulation is to protect the base in the horizontal plane (mainly from capillary groundwater). An important component of horizontal waterproofing is the drainage system, which is installed when the groundwater level is high.

It is worth noting that under the “tape” there must be a fairly strong base, on top of which the waterproofing layer will be laid. Often, for this purpose, a “cushion” is cast that is slightly wider than that of the future foundation. If there is no need for high quality (for example, if the foundation is being built for a bathhouse), it is enough to prepare a screed from sand and cement in a 2:1 ratio. During the Soviet era, asphalt screed was made, but today this technology is practically not used.
The horizontal waterproofing procedure consists of several stages.
Stage 1. The bottom of the pit dug under the foundation is covered with a sand “cushion” about 20-30 cm thick (clay can be used instead of sand) and thoroughly compacted.
Stage 3. When the screed dries (this takes about 12-14 days), it is covered with bitumen mastic and a layer of roofing material is attached. Then the procedure is repeated: applying mastic - attaching roofing felt. Another screed of the same thickness is poured on top of the second layer.

Stage 4. When the concrete hardens, the construction of the foundation itself begins, the surfaces of which are additionally covered with vertical types of waterproofing (they will be discussed later).


Important information! If the building is constructed from a log frame, then it is necessary to waterproof the top of the foundation, since the first crown will be installed there. Otherwise, the wood may rot.
Drainage
Drainage may be required in two cases:
- if soil permeability is low and water accumulates rather than being absorbed by it;
- if the depth of the foundation is lower than or corresponds to the depth of groundwater.

The algorithm of actions for arranging the drainage system should be as follows.

Stage 1. Along the perimeter of the structure - approximately 80-100 cm from the foundation - a small pit is dug, 25-30 cm wide. The depth should exceed the depth of pouring the foundation by 20-25 cm. It is important that the pit has a slight slope in the direction of the drainage basin, where water will accumulate.

Stage 2. The bottom is covered with geotextile, and the edges of the material must be folded onto the walls by at least 60 cm. After this, a 5-centimeter layer of gravel is poured.
Stage 3. A special drainage pipe is installed on top, maintaining a slope towards the catchment of 0.5 cm/1 linear. m.


Laying the pipe on geotextiles and backfilling with crushed stone


Thanks to this design, water will flow into the drainage pipe, but it (the pipe) will not become clogged. The moisture will be drained into a drainage tank (this can be a well or a pit, and the dimensions depend on the influx of water and are determined individually).

Prices for a drainage well
drainage well
Vertical waterproofing
Vertical type insulation is the treatment of walls of a finished foundation. There are several ways to protect the foundation, which are possible both during the construction of the building and after construction.
Table. Strengths and weaknesses of the most popular waterproofing options
| Material | Operational life | Easy to repair | Elasticity | Strength | Cost, per m² |
|---|---|---|---|---|---|
| From 5 to 10 years | ★★★☆☆ | ★★★★★ | ★★☆☆☆ | About 680 rubles | |
| Polyurethane mastic | From 50 to 100 years | ★★★☆☆ | ★★★★★ | ★★☆☆☆ | About 745 rubles |
| Rolled bitumen materials | From 20 to 50 years | ★☆☆☆☆ | - | ★☆☆☆☆ | About 670 rubles |
| Polymer membranes (PVC, TPO, etc.) | From 50 to 100 years | - | ★☆☆☆☆ | ★★★☆☆ | About 1300 rubles |

Inexpensive and simple, and therefore the most popular method of waterproofing the foundation. It involves complete treatment with bitumen mastic, which penetrates into all cracks and voids and prevents moisture from entering the house.

Important information! When choosing a particular bitumen mastic, pay attention to the markings - this will help you find out the heat resistance of the material. For example, mastic marked MBK-G-65 has a heat resistance (for five hours) of 65°C, and MBK-G-100 – 100°C, respectively.
Advantages of bitumen mastic:
- ease of use (can be done alone);
- affordable price;
- elasticity.


Flaws:
- low speed of work (requires application of several layers, which takes a lot of time);
- not the best water resistance (even high-quality application does not guarantee 100% protection);
- fragility (after 10 years you will have to re-treat the foundation).
The process of applying mastic itself is extremely simple and consists of several stages.
Stage 1. Surface preparation. Below are the basic requirements.
- The surface of the foundation must be solid, with chamfered or rounded (ø40-50 mm) edges and corners. In places where the vertical and horizontal transitions, fillets are made - this way the joining surfaces will be joined more smoothly.
- Sharp protrusions that appear where formwork elements meet are extremely dangerous for bitumen. These projections are removed.
- Areas of concrete covered with shells of air bubbles are rubbed down with fine-grained cement mortar based on a dry building mixture. Otherwise, bubbles will appear in the freshly applied mastic, which will burst 10 minutes after application.
Also, dirt and dust should be removed from the surface and then dried thoroughly.

Important information! The humidity of the base is a very important indicator and should not exceed 4%. At a higher rate, the mastic will swell or begin to peel off.
Testing the base for moisture is quite simple: you need to lay a piece of PE film measuring 1x1 m on the concrete surface. And if after a day there is no condensation on the film, then you can safely proceed to further work.
Stage 2. In order to increase adhesion, the prepared base is primed with a bitumen primer.

You can go the other way and prepare a primer from bitumen yourself. To do this, bitumen grade BN70/30 must be diluted with a quickly evaporating solvent (for example, gasoline) in a ratio of 1:3.

One layer of primer is applied over the entire surface, and two at the junction points. This can be done with either a brush or a roller. After the primer has dried, the actual mastic is applied.
Stage 3. The bitumen block is broken into small pieces and melted in a bucket over a fire.


It is recommended to add a small amount of “working off” during heating. Then liquid bitumen is applied in 3-4 layers. It is important that the material does not cool down in the container, because when heated again, it partially loses its properties.

The total thickness of the waterproofing layer depends on the depth of pouring the base (see table).
Table. Ratio of bitumen layer thickness to foundation depth
Stage 4. After drying, the bitumen should be protected, since it can be damaged when backfilled with soil containing debris. To do this, you can use rolled geotextiles or EPS insulation.
Prices for bitumen mastic
bitumen mastic
Video - Insulating the foundation with EPPS
Reinforcement
Bituminous insulation requires reinforcement for:
- cold seams;
- the junction of surfaces;
- cracks in concrete, etc.
Fiberglass and fiberglass fabrics are often used for reinforcement.

The fiberglass material must be buried in the first layer of bitumen and rolled using a roller - this will ensure a tighter fit. As soon as the mastic has dried, the next layer is applied. It is important that the fiberglass material is laid with an overlap of 10 cm in both directions.

Reinforcement will ensure a more uniform distribution of the load over the entire insulating strip, minimize the elongation of bitumen in places where cracks have opened and, as a result, significantly extend the service life.

Prices for fiberglass
fiberglass
It can serve as both the main protection and a supplement to the applied bitumen mastic. Typically, roofing felt is used for this.

Among the advantages of the method are:
- low cost;
- availability;
- good service life (about 50 years).
As for the shortcomings, this can only include the fact that you cannot cope with the work alone. The algorithm of actions should be as follows.
Stage 1.

Unlike the previous method, there is no need to carefully apply the material, since mastic is necessary solely for attaching the roll waterproofing to the base.
Stage 2. Using a burner, the roofing material is slightly heated from below, after which it is applied to a layer of hot bitumen. Sheets of roofing felt are joined with an overlap of 10-15 cm, all joints are processed with a torch.

Stage 3. After attaching the roofing felt, you can backfill the foundation, since additional protection is not required here.

Important information! Roofing felt can be replaced with more modern materials that are fused to the base. These can be polymer films or canvases with bitumen-polymer coating (for example, Izoelast, Technoelast, etc.).
Prices for roofing material
roofing felt
Video - Waterproofing with roofing felt


This method is extremely simple to perform and is used for waterproofing and leveling the foundation surface. Here advantages of plaster waterproofing:
- simplicity;
- high speed;
- affordable cost of materials.
Flaws:
- low water resistance;
- short service life (about 15 years);
- possible appearance of cracks.


There is nothing complicated in the application process. First, a putty mesh is attached to the foundation using dowels, then a plaster mixture with water-resistant components is prepared. The mixture is applied to the foundation using a spatula. After the plaster has dried, the soil is filled in.
Essentially, it is a dispersion of polymer-modified bitumen particles in water. The composition is sprayed onto the base, providing high-quality waterproofing. Advantages this method are as follows:
- high quality waterproofing;
- no need for special skills;
- durability.

But there is also flaws:
- high cost of the composition;
- low speed of operation in the absence of a sprayer.
In addition, liquid rubber cannot be purchased everywhere. The same type of composition, which comes in two types, is quite suitable for the foundation.

- Elastomix - applied in 1 layer, hardens for about 2 hours. No further storage after opening the package.
- Elastopaz is a cheaper option, but is applied in 2 layers. Typically, Elastopaz can be stored even after opening the package.

Stage 1. The surface is cleaned of dirt and debris.
Stage 2. The foundation is coated with a special primer. As an alternative, you can use a mixture of liquid rubber and water (ratio 1:1).
Stage 3. After an hour, when the primer has dried, a waterproofing material is applied (in one or two layers, depending on the type of composition). It is advisable to use a sprayer for this, but you can use a roller or brush instead.

Prices for liquid rubber
liquid rubber
Video - Treating the base with liquid rubber
Penetrating insulation
On the base, previously cleaned of dirt and slightly moistened with water, a special mixture (Penetron, Aquatro, etc.) is applied with a sprayer, penetrating into the structure approximately 150 mm. It is important that the solution is applied in two or three layers.

Basic advantages:
- effective protection;
- the ability to treat surfaces inside the building;
- ease of operation;
- long service life.
Flaws:
- low prevalence of such solutions;
- high price.

Making a clay castle
A simple but at the same time effective way to protect the base from moisture. First, a pit 0.5-0.6 m deep is dug around the foundation, then the bottom is filled with a 5-centimeter gravel or crushed stone “pillow”. After this, clay is poured in several stages (each layer is carefully compacted). The clay itself will serve as a buffer against moisture.

The only advantage of the method is its ease of implementation.
A clay castle is only suitable for wells and household objects. If we are talking, for example, about a residential building, then this method can only be used as an addition to the existing waterproofing.
This method of protecting the foundation appeared relatively recently and consists of the following: mats filled with clay are nailed to the cleaned surface of the foundation using a mounting gun or dowels. The mats should be laid with an overlap of approximately 12-15 cm. Sometimes special clay concrete panels are used instead of mats, and in this case the joints must be additionally processed.

 Overlap - photo
In principle, screen insulation is an improved version of a clay castle, and therefore can only be used for utility buildings.
To sum it up. Which option should I choose?
The optimal option for waterproofing a strip foundation should include both horizontal and vertical waterproofing. If, for one reason or another, horizontal insulation was not laid during construction, then it is better to resort to bitumen mastic or special plaster. But, we repeat, this will be most effective only in combination with horizontal type protection.
Waterproofing the strip foundation of a residential building is necessary to prevent moisture from sediment and groundwater in the concrete and reinforcing elements included in the foundation structure. Wetting of concrete provokes destruction of the foundation due to the expansion of frozen water in the capillaries of the concrete tape and leads to corrosion of steel reinforcement, reducing the strength properties of the foundation of the house. Owners of individual buildings are able to independently correctly carry out work on waterproofing the foundation of their home, possessing certain knowledge in this area.
The destructive effect of moisture on the foundation of a building occurs when water interacts with the materials of the foundation structure. The porous structure of concrete, saturated with capillaries, contributes to the constant absorption of moisture from the environment and groundwater by concrete. In order to make the strip foundation of a residential building as protected as possible from a damp environment, it is necessary, in accordance with (previously SNiP 2.03.11-85), to ensure its waterproofing using methods of primary and secondary corrosion protection (clauses 4.5, 4.6 and 4.7). Foundation waterproofing falls into the category of secondary protection, based on the use of protective coatings or treatment with special compounds.

Scheme of waterproofing strip foundation.
Builders with their own hands or with the involvement of specialized organizations carry out measures to apply waterproofing materials to the foundation, taking into account external factors affecting the foundation of the house:
- Atmospheric precipitation and melt water;
- Groundwater.
To guarantee the protection of the foundation from the penetration of sedimentary and melt water, it is enough to make a high-quality blind area around the perimeter of the entire building. To implement hydraulic protection from ground moisture, it is necessary to take into account a set of initial data, among which the main ones are:
- Type of groundwater near the structure;
- Depth of groundwater passing near the building;
- Heterogeneity of soils in the construction area;
- Purpose and planned operation of the house.
Let's consider how these factors influence the choice of foundation waterproofing method.
Type of groundwater
Groundwater has a direct impact on the formation of the groundwater level (GWL) in the area of the construction site and on the degree of soil moisture near the foundation. The diagram below shows the distribution patterns of the two main types of groundwater in soil:
- Verkhovodkas are local centers of water formation that have a seasonal nature of existence. Verkhovodka lies near the earth's surface, forms and exists only during times of high environmental humidity, disappearing during dry periods;
- Groundwater that occurs near the surface of the earth and has a territorial regional distribution. Groundwater levels are subject to seasonal fluctuations.

As mentioned above, to protect against high water, it is enough to make a good blind area and storm drainage. Protection from groundwater will depend on its depth. This dependence is discussed below.
Depth of groundwater
“Recommendations for the design of waterproofing of underground parts of buildings and structures” Central Research Institute of Industrial Buildings, M., 1996 (amended in 2009), determined that waterproofing of structures must be carried out above the maximum ground level by at least 0.5 m (p. clauses 1.8 and 1.9). Since the average value of fluctuations in the level of hot water in many regions of the Russian Federation, according to the results of geological surveys, is accepted within 1.0 m, then in order to guarantee protection of the foundation from ground moisture, it is recommended to adhere to this indicator as a basic reference point when choosing waterproofing for the base of a building, depending on the depth of the hot water. . In particular:
- When the water level is less than 1 m below the base of the foundation, it is necessary to waterproof the foundation;
- If the groundwater level is located more than 1 m deeper than the foundation, hydraulic protection may not be installed.
It is necessary to take into account the possibility of increasing the water level as a consequence of infrastructure development in the region. As well as the maximum groundwater level for past seasons.
At a high level of hot water exceeding the lower level of the foundation base, in addition to waterproofing, it is necessary to additionally make local drainage to remove moisture from the foundation, as prescribed in “Design and construction of bases and foundations of buildings and structures” (Chapter 11).
Soil heterogeneity
The heterogeneity of soils with different chemical compositions leads to chemical aggression of groundwater towards concrete in the foundation, up to its destruction (concrete corrosion). The use of special corrosion-resistant concrete grade W4 is required when pouring the foundation and highly reliable hydraulic protection made from materials resistant to aggressive environments.
Purpose and planned operation of the house
If there are basements equipped with your own hands for functional purposes such as a gym, workshop, etc. increased demands are placed on the reliability of waterproofing in order to prevent deterioration of the microclimate in these rooms.
Properly arranged waterproofing of the strip foundation of a residential building requires compliance with three basic principles for constructing a waterproofing system for the foundations of buildings of any purpose:
- Continuity of each layer of waterproofing along the entire perimeter of the waterproofing;
- Installation of a waterproofing layer only on the side exposed to moisture, i.e. waterproofing the foundation should be carried out outside, but in no case inside the basement;
- Preliminary special preparation of the outer surface of the foundation for subsequent application of waterproofing material.
Types of waterproofing of strip foundations
According to clause 5.1.2 of the set of rules (formerly SNiP 2.03.11-85), waterproofing of a concrete structure is ensured:
- Paint and varnish and mastic coatings;
- Coating and plaster coatings;
- Pasted insulation;
- Impregnation of the surface layer of the structure or other surface treatment methods.
In relation to strip foundations, taking into account modern technologies for applying waterproofing, vertical waterproofing is divided according to the method of installation into the following types:
- Coating (painting);
- Welded;
- Plastering;
- Stick-on;
- Injection;
- Impregnating;
- Sprayable.
Coating (painting) waterproofing

Waterproofing using coating technology is based on the use of bitumen and bitumen-polymer emulsions and mastics with the formation of waterproof films on the surface of the foundation.
Coating waterproofing protects the foundation from the penetration of capillary ground moisture in low-moisture soils when groundwater is removed 1.5-2 meters below the basement floor level. In the presence of hydrostatic pressure, it is permissible to use coating technology in the following options:
- Bitumen mastic is used for pressure no higher than 2 m;
- Bitumen-polymer mastic - for a pressure of no more than 5 m.
Mastics are applied in 2-4 layers. The thickness of the coating waterproofing depends on the depth of the strip base and is:
- 2 mm – for a foundation with a laying depth of up to 3 meters;
- 2-4 mm – for a foundation with a laying depth of 3 to 5 meters.
The advantages of coating bitumen protection are as follows:
- Relatively low cost;
- No special requirements for the qualifications of performers;
- High elasticity;
- Excellent adhesion.
Among the disadvantages, it should be noted the short service life - after 6 years the insulation loses its elasticity. The waterproofing layer becomes covered with cracks, which reduces the overall level of waterproofing. To increase the shelf life of the insulation, polymer additives are added to ensure increased performance characteristics of the waterproofing coating.
The technology for applying mastic is simple. A special primer is applied to the previously prepared surface with a roller or brush, ensuring deep penetration into the foundation material. After the primer has dried, bitumen mastic is applied in layers.

Welded and glued waterproofing

These technologies relate to methods of waterproofing with roll materials. They are used both as independent waterproofing measures and as an addition to the do-it-yourself coating method. When using adhesive waterproofing, traditional roofing felt is used, which is fixed to the foundation surface treated with a bitumen primer.
With glued waterproofing, the thickness of the waterproofing layer reaches 5 mm. The use of 2-3 layers is allowed.

Roofing felt can be fixed with special adhesive mastics in several layers with an overlap of 15-20 cm. If the fixing of roofing felt is carried out by heating with a gas burner, we will obtain fusing technology. From modern materials, instead of roofing felt, roll waterproofing materials are used - Technonikol, Technoelast and other materials for fusing polyester on a polymer base, which increases the wear resistance of the coating. The service life of such waterproofing is 50 years.
Plaster waterproofing

Laying waterproofing using the plaster method is identical to plastering walls using beacons with your own hands. For insulation, mixtures of moisture-resistant components such as polymer concrete and hydroconcrete are used. The minimum thickness of the applied layer should be 20 mm.
The advantages of the plastering method include the low cost of materials and ease of implementation.
Among the disadvantages it is necessary to note:
- Average level of moisture resistance;
- Short service life, after 5 years cracks appear through which water can leak.
Injection waterproofing

The injection method of waterproofing is based on pumping special polymer injector mixtures under pressure into the pores of the foundation. For injection technology, materials are produced on a mineral or polyurethane basis, with a density close to ordinary water. If you use polyurethane-based compounds, then at least 1.5 liters will be required to waterproof each square meter, while acrylic-based mixtures will require much less. Perforation for injection is performed using conventional hammer drills or drills; the dimensions of the holes (from 25 to 32 mm) are determined by the diameters of the injection packers and capsules. Upon completion of the injection process, the perforation is sealed with a cement-sand mixture of normal composition.
Impregnation waterproofing

This technique is based on the impregnation of concrete with special organic binding materials that fill the capillaries of the concrete and form an anti-hygroscopic layer in the concrete up to 30-40 mm deep.

The technology of spraying waterproofing material requires the use of a special sprayer. While the cost of materials is high, their use is economically justified for waterproofing foundations of complex configurations that are difficult to process in other ways.
Drainage as an auxiliary measure
The arrangement of drainage systems is intended to remove excess moisture from the foundation system of a building at a high level of groundwater. According to clause 11.1.15 of the set of rules, drainages are divided into general and local. Their use in combination with waterproofing helps protect the foundation from the penetrating effects of ground moisture.
Do-it-yourself waterproofing of a strip foundation is a complex technological process that requires a clear understanding of each stage of the entire event. Only in this case will a long term of trouble-free operation of the house be ensured.
Advice! If you need contractors, there is a very convenient service for selecting them. Just send in the form below a detailed description of the work that needs to be performed and you will receive proposals with prices from construction teams and companies by email. You can see reviews about each of them and photographs with examples of work. It's FREE and there's no obligation.


Carrying out waterproofing for the foundation is possible only taking into account several factors, such as: type of soil, groundwater level, climatic conditions, type of foundation. You can do without waterproofing in hot regions with minimal precipitation and low humidity, as well as when there is a deep passage of groundwater. In other cases, waterproofing is necessary for any structure. Read more about what foundation waterproofing is, types of waterproofing, and methods of application in our article.

External waterproofing of the basement
How does moisture affect the foundation?
Water damages the integrity of the foundation in at least two ways.
First of all, this is the washing out of concrete, the appearance of roughness and potholes on its surface.
No less dangerous is the icing of water that has entered the pores of concrete. When water freezes, it tends to expand in volume rather than contract. Penetrating inside the foundation structure, when frozen, it destroys it inside, forming cracks and crevices. Therefore, during construction, waterproofing of the foundation should be carried out during the construction process.

Foundation destruction due to lack of waterproofing
Why waterproofing?
In the basement of a building without good waterproofing, flooding and leaks on the floor, and mold on the walls will certainly appear. It is unacceptable to save food or household items in such a house. It is important to select high-quality materials for waterproofing and follow foundation construction technology to protect the house from the destructive effects of moisture.
Waterproofing performs important tasks:
strengthens the foundation and extends the service life;
prevents distortion of the walls of the house and the formation of cracks;
prevents leakage of walls and the presence of water in basements, mold formation; protects from natural destroyers.
Types of moisture insulation
It is divided into the following types:
horizontal;
vertical;
blind area device.
In some cases, all means of protection are used at once.
Horizontal waterproofing
It is used to prevent moisture from moving from one level to another. Intended for all types of foundations: strip, slab, individual supports.

Horizontal insulation - most often used to protect the walls of a house
Such protection is the treatment of the walls of a ready-made foundation. Vertical waterproofing is designed to protect the base of the structure from the influence of surface water. It is only necessary for strip and column supports of the structure.

Vertical waterproofing directly protects the foundation
On our website you can find contacts of construction companies that offer foundation design and repair services. You can communicate directly with representatives by visiting the “Low-Rise Country” exhibition of houses.
This type of protection protects the foundation from the effects of precipitation and melted snow in the spring. In this case, the width of the structure plays an important role. If the width is insufficient, moisture will be carried away a short distance and will be able to reach the foundation.
The following means are used for its construction:
-
sidewalk tile;
-
waterproof membranes.
asphalt concrete;
The method of constructing the blind area is selected taking into account the architectural properties and price of materials. The most budget-friendly option for a blind area would be to build it from concrete or asphalt. This method does not add decorativeness, but protects the foundation of the building without significant financial costs and labor costs. The construction of a blind area made of concrete or asphalt is widespread in the large-scale construction of high-rise residential buildings and collective buildings.

The blind area prevents moisture from draining from the walls under the foundation
General technical rules
There are a number of technical requirements for each insulation method.
It is imperative to take into account the height of surface water.
Consider the purpose and operating conditions of the facility.
Consider the possibility of floods or heavy precipitation.
Take into account the properties of the soil during frosts.
The optimal method of protecting a strip foundation should combine vertical waterproofing in combination with horizontal type protection.
Insulation by method of application
Vertical and horizontal insulation according to the method of application can be divided into the following types:
pasting;
plastering;
painting;
mounted;
injection.
Let's look at these methods in more detail.
Pasting
Pasted insulation from moisture is based on the use of roll products based on bitumen binder. Fused or adhesive material is used to waterproof the foundation. This method involves applying a heated layer of glue and gluing it to the surface. To carry out such protection without using a layer of glue, you will need to use bitumen mastic instead of fastening.

Pasted waterproofing is most often applied using the “hot” method.
Pasting agents include:
roofing felt is the most popular method;
roofing felt, which is still used given its cheapness, but should not be used as protection for the main structures of buildings;
glassine - thick cardboard impregnated with bitumen binder;
polymer materials with bitumen impregnation.
Plastering
This waterproofing is of the coating type.
Now there are many means of protecting against moisture - these are solutions that, in addition to asphalt or cement with sand, contain additives that impart beneficial properties.
The most common among them: liquid glass, sodium aluminate, ceresite.

Plaster insulation is “smeared” onto the foundation
Painting room
Painted waterproofing can be hot or cold and involves applying a complex layer 1-1 mm thick of protective agents. The most suitable among them are hot polymer-bitumen and cold epoxy-rubber coatings. This foundation waterproofing device is widely used to protect against capillary moisture.

Painted insulation is more liquid than plaster insulation
Mountable
For installed waterproofing, various fiberglass plastics, rigid polyvinyl chloride, and prefabricated reinforced concrete products are used. The disadvantage is the high cost and laboriousness of the preparatory work. Such insulation is used when the use of conventional waterproofing is impossible.

Mounted roll waterproofing of the foundation
Injection
This waterproofing method is based on the process of creating a membrane between a layer of wet soil and the foundation. The method involves introducing a hydrophobic gel into the structure, which, when hardened, closes all pores, preventing water from penetrating.
What is injection waterproofing and how is it used for restoration work, see the video:
What influences the installation of waterproofing
The foundation serves as the foundation of any home. The service life of the building as a whole depends on its construction. Before starting, you should outline the complex of waterproofing work to be carried out.
The decision may be influenced by the following factors: the height of groundwater flow, the forces of frosty increase in soil volume, the circumstances of the building’s operation, soil heterogeneity.
Types of foundation installation
With the strip type, the foundation is built in the form of a strip at a certain depth. The canvas rests on foundation slabs, which allows the load to be evenly distributed over the entire surface.
Pile is the most budget-friendly and simplest type of foundation, in which the consumption of materials is minimal. It consists of separate pillars and is used in the construction of buildings that do not need continuous strip support. These are lightweight houses, the structure of which contains a load-bearing lower beam and structures, and the walls consist of horizontal large-sized elements.
A slab foundation is the foundation of a building in the form of a flat reinforced concrete slab. For a foundation slab, there is no need to dig a deep pit; you just need to remove the top layer of soil and fill it with crushed stone or gravel to protect the foundation slab from capillary moisture.
Surface water level
Let's look at how to do waterproofing at a given water level. If the height of surface water below the base of the foundation is more than 1 meter, you can get by with vertical coating protection and horizontal protection using roofing material. The location of surface water close to the foundation, but below the height of the basement floor, requires an expanded range of work. The horizontal protection is laid in 2 layers and coated with bitumen mastic. For vertical waterproofing, both the pasting and coating methods are used. All concrete devices are treated with agents that prevent the penetration of capillary moisture.
If the location of groundwater is higher than the foundation or basement floor, a drainage system should be added to the above methods. The cost of these works depends on its size, quantity and type of means used.

House foundation drainage
The presence of excess moisture in the soil is a difficult but solvable issue for a plot of land. In this case, it is necessary not only to carry out waterproofing, but also to drain this area.
Experts recommend waterproofing first when installing the foundation. One of the most used methods is the use of waterproofing and water-repellent components for concrete mortar. After all, these components not only prevent the effects of moisture, but also speed up the hardening of the mixture, strengthen the foundation and increase its frost resistance. At the same time, you can add components that simultaneously enhance both hydro and thermal insulation.
How to do waterproofing, see the following video:
How to protect an already poured foundation
If waterproofing was not carried out during construction, no problem. There are methods of protection against moisture for the finished building. In this case, pasting waterproof sheets or rolls made of bitumen-polymer material are used. Today this work is done using self-adhesive materials. Coating insulation - cement, bitumen and polymer solutions, mastics or emulsions - for waterproofing the foundation, these materials are used both during construction and to correct and eliminate cracks or chips that have appeared in the foundation.

Trust the experts
As practice shows, errors in waterproofing are difficult and expensive to correct during operation, so for safety reasons you should contact specialists at the construction stage. It is better to do waterproofing when erecting a building, because repairing the foundation in the future will be more expensive and require more labor than erecting a house. Experts will analyze the surface of the building site and recommend the most suitable type of foundation. They will competently and quickly calculate its installation, taking into account ventilation, sewerage and all utility networks. Specialists from construction companies will carry out high-quality construction of the foundation, organization of waterproofing, and insulation of the structure.


- Installing knives on an electric planer
- Practical wood carving tips for beginners
- Design of a sauna stove - types and design features Round sauna stove
- Photos of small houses and how to build them yourself Stylish small house
- Cold restoration of facade ceramics
- Aluminum casting at home: making molds, technological process Using a stove
- How to carve a monkey from wood with your own hands: photos and ideas for beginners and carving masters
- Wall decor - DIY paper fan Crafted round paper fan for decoration
- The refrigerator does not freeze, but the freezer works. LG two-chamber refrigerator freezer does not work.
- The correct approach to installing a built-in dishwasher
- Biogas from manure: how profitable it is and how to make Biogas from manure with your own hands
- We make firewood sheds and woodpiles with our own hands
- Master class “Kite” What is a kite made of
- Simple and original ideas for those who don’t know how to make a bird feeder with their own hands from scrap materials How to decorate a bird feeder from a box
- Molds made from epoxy and scrap materials
- DIY treehouse DIY treehouse for kids
- Surviving in winter without a tent How to make a cave from a tunnel
- We make templates for roses from foamiran on our own
- A vase made of newspaper tubes and a topiary made from natural material “autumn colors” Preparation of the necessary materials
- Electric motor soft start device